 DMac shares his home improvement expertise
Few home improvement projects make as much a difference as replacing your old, drafty windows. The single-paned windows that were once standard in our homes are now something from the past. While window replacements are often done by a major home improvement company, it’s always nice to have some information on how to install your replacement windows yourself. In this blog, we’ll be going over how to install replacement windows so that you can get an idea of how the process follows.
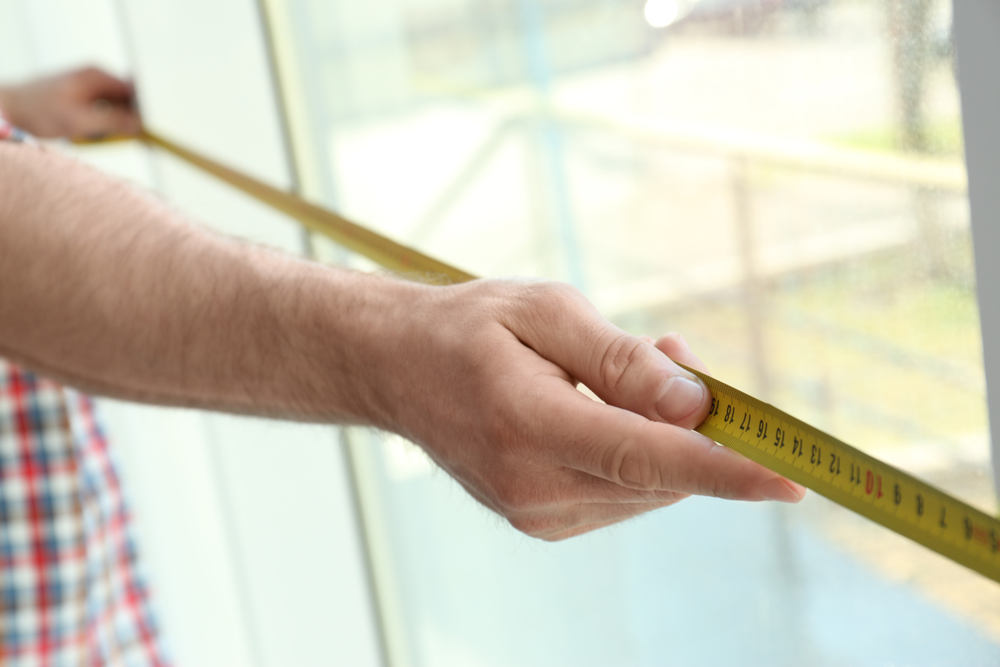
1. Measure your Windows
The very first thing you have to do is measure your windows. Start by measuring the inside of one window jamb to the opposite jamb at the bottom, middle, and top, both horizontally and vertically. Choose the smallest measurement when ordering your windows. Measuring your windows has to be done with exact precision. If done incorrectly, you’ll order an incorrect sized window that will either not fit in the opening, or will require some extra work to fix it properly. The benefits of working with a professional is that you will eliminate the chances of making a mistake in the measurements, which could many times cost you more than working with a professional.
2. Remove the Window Stops
Use a pry bar and hammer to carefully pry away the window stop molding from the top and sides of the window frame. You may be able to reuse the stop moldings if removed carefully. However, if your stop moldings are old and brittle, it may be easier to simply buy and install new moldings.
3. Remove the Inner Sash
Meticulously remove the inner window sash from the opening and remove the knotted weight cords from the holes on the sides of the sash frame. Sometimes they can be nailed into the sash frame.
4. Remove the Parting Stops
Use a small pry bar or a flat screwdriver to remove the narrow parting stop moldings that separate the inner window from the window’s outer sash. These parts will not be reused, so feel free to break them if you’re having a hard time freeing them from the window frame.
5. Remove the Outer Sash
Now that the parting stops are removed, the outer window should be able to slide out of the frame. Go ahead and free it from the sash cords by pulling the knots out of their openings on the sides of the sashes frame.
6. Remove the Counter Weights and Pulleys
Next, open the weight pockets on the sides of the window frame and remove the heavy weights. Cut the sash cords and remove the cords. After that, unscrew the pulleys that are located at the top of the window frame.
7. Test-Fit Your New Window
Now test fit the window in the frame opening and shim it into place. You will need a carpenter’s square and a torpedo level to adjust the window, so it’s level and square.
8. Secure the Window
Once you’ve ensured that the window will fit properly, remove it from the opening and apply caulk to the window’s frame according to your window’s specific instructions. Reinsert the window and adjust for level using a framing square and a torpedo level. Utilize shims to slightly wedge the window in place.
Test both sashes to ensure the window glides smoothly. If the sashes are too tight, use the adjustment screws (located in the side channels) to adjust it. If this does not solve the problem, then you may have to replace the shims you used with thinner ones.
Once your window fits properly and the sashes move freely, drive in mounting screws through the channels on the sides and into the window frame to secure in place. Be sure not to overtighten the screw as it can pull the sash frame out of the square.
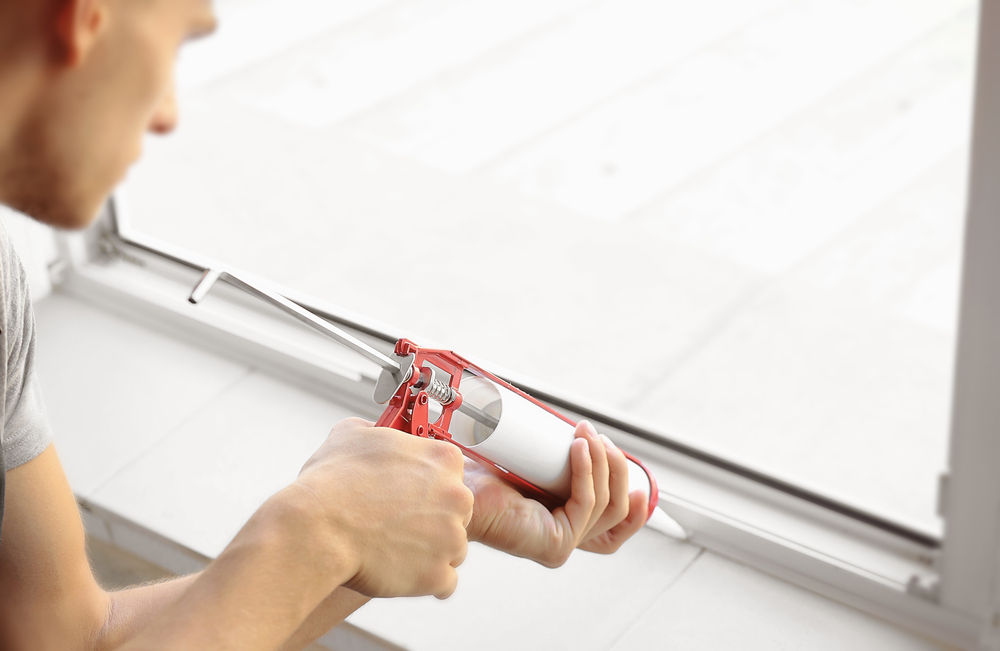
9. Caulk the Joints
Now slide the header piece up to eliminate gaps and apply the recommended caulk to the joints on both sides of the window. Carefully follow the manufacturer’s instructions as some windows require leaving a gap at the bottom for drainage.
10. Install the Window Stops
Next, reattach the window stops around the top and sides of the new replacement window using screws or a brad nailer.
11. Caulk & Paint
Finally, complete the replacement window installation by caulking the joints located around the stop moldings. If needed, finalize with whatever painting may be needed.
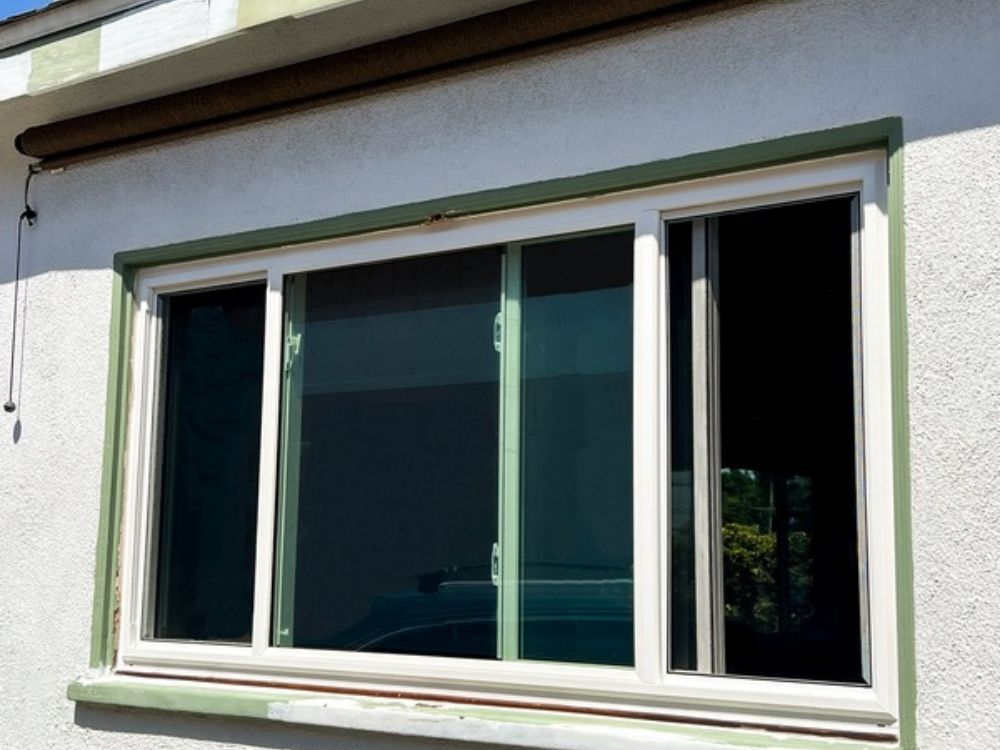
Replace Your Windows with Family Home Improvements
Installing your windows is no easy job. All windows are different and have different circumstances. Some windows projects may require a different procedure, while others may require some repairs. This is where a professional window installer will significantly benefit you! Whether your current windows have issues or not, a professional window installer will ensure you get the best quality installation possible. You’ll secure the energy efficiency and soundproofing benefits of your new windows and get the most bang for your buck in the long run! At Family Home Improvements, we can help professionally replace all of your windows for a great price! It’s a win-win! You don’t have to do work, you’ll get a quality job, and you’ll save money! Let us help take your home to the next level! Contact Family Home Improvements at (562) 464-0684 or click here for a free quote!
Related Posts


Get a Free Quote
Family Home Improvement
Family Home Improvements has been in business for over a decade providing excellent services with experienced, well-trained, and courteous crews. Many homeowners have used Family Home Improvements and are now repeat clients, requesting expert help from Family Home Improvements with other aspects of home improvement, including room additions, door installations, and kitchen and bathroom makeovers.
A Five-Star Company

These guys are awesome. They did a coating on my house called “Texcote”. I love it. My house has never looked better. The crew was great. They were Clean on time and very nice, and after they finished, Renzo himself came back to do an inspection and check to see if I was happy. Not many companies do that. I thought that was great. Definitely will recommend them, and I will use them from now on for all my home improvement needs.
-Victor G.
Let’s Make Things Happen
We take the confusion, stress, and headache out of the entire home improvement process. Our team members walk you through the entire journey!
“Hired Family Home Improvements to paint my house. Renzo was there every day to answer any of my questions and keep me informed. Jose Luis and Jose were very professional and did a great job. They were very nice and worked with me on any concerns I had. Would definitely hire again and recommend.”
Lori K.
Family Home Improvements Customer from Orange, CA


")


